

Building the MachNone
A Sky Pup Construction Project
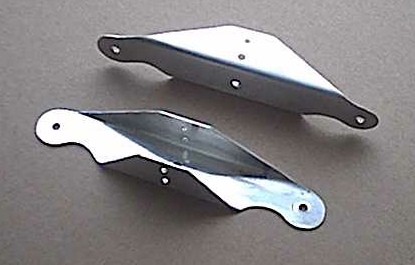
The process of making the control horns out of aluminum sheet is a skill that not many people acquire, but which is necessary to successfully complete the Sky Pup. This was a new experience to me, but one that in the end gave a lot of satisfaction to see the shiny end-products! If like me, you are new to sheet metal work here's how I did it.
Step One: Cutting the blank.
By studying the plans it is easy to determine the approximate size of the blank
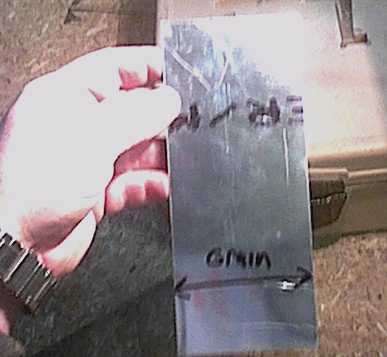
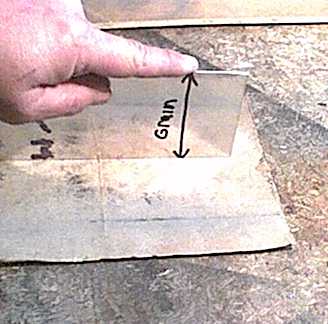
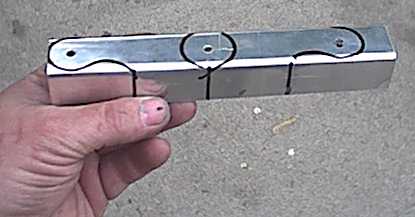
piece. It is important to realize that your metal sheet has a grain and you must cut it so that your bends are made 90 degrees to the grain. If your bends are made parallel to the grain the metal is likely to fatigue and crack at the bends. Be sure to make it a bit oversize expecially in the width for working. The piece shown will become the control horn on the stick torque tube. I started with a blank 3"x7". I used a table saw with a carbide tipped blade to cut the blanks. It helps to raise the blade higher than you usually do and feed the piece slowly.
Step Two: Clean up the edges.
Before you go to bending, clean up the edges carefully. Start with a file and make sure the edge is straight, file out any nicks and burrs. Then use a file or a piece of fine sandpaper to polish out any saw or file marks on the edges. There should be no scratches on the edges or they may provide a stress area when bending and weaken the piece. Don't radius the edges beyond taking off any burrs. By the way, wear gloves! Also, the idea is to polish the edge flat, don't bevel or round the edge, but don't leave any sharp burrs either.
Step Three: Make a bending block.
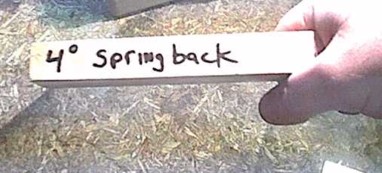
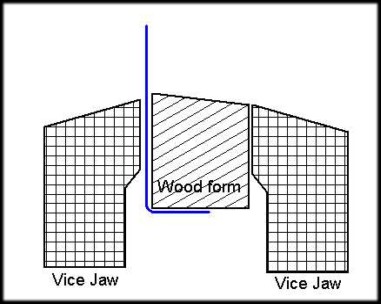
Actually you will probably make two blocks to form the u-shaped channel around. The first one is easy. Make it a little bit wider than the width of your blank. Height isn't too important, just high enough that it has more height than your first leg of the part you are forming. You need to cut the top of the form with a 4 degree bevel so that when you bend over the form it allows a sufficient spring back. The four degrees will allow your bend to actually be a right angle. Oh, yes be sure to sand a radius on the edge over which your bend will be formed. The plans say the sheet needs a 3/32 bend radius.
Step Four: Clamp up
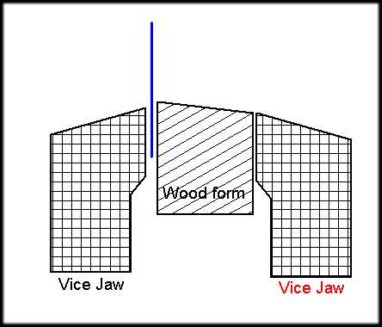
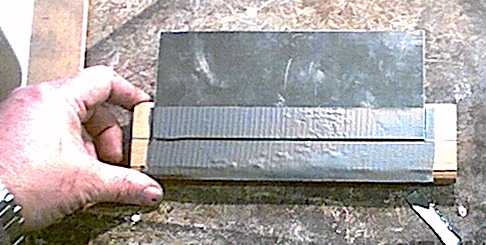
Mark and draw a line 1/16 inch longer than the first leg of your part. Lay your blank along the line and tape it in place with duct tape. Add a layer of duct tape to the face of your vice jaws to protect the metal and then place the form in the jaws and tighten. Align the top edge of the form a little higher than flush with the top of the jaws.
Notice the 4 degree bevel on the wooden bending block in order to give the metal a springback. The resulting bend will be very close to 90 degrees.
I used a strip of duct tape to fix the metal in the desired location over the bending block. It helps keep it in place and protect it from scratches.
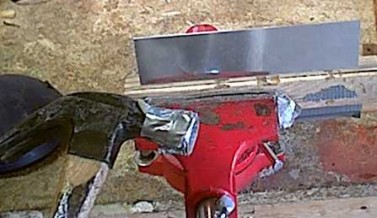
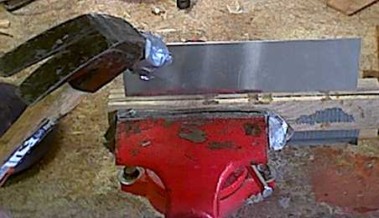
Step Five: Make first bend with hammer.
Begin to hammer the metal over the form. Begin tapping gently at the top of the sheet and as it bends work downward to the bottom edge. Start tapping at the left edge, work right and back again. Work in small increments. Since the sheet is wider than the jaws of the vice, as you get toward the center, you will want to reposition the blank in the vice so that the area you are working on is always clamped firmly. Keep tapping until it is wrapped in 90 degree bend over the form. Remove from the vice and form. Note: I padded the hammer face with several layers of duct tape to protect the surface of the sheet metal.
Step Six: Make form for second bend.
This is a bit more tricky. You want to cut the height of the form to be exactly the final inside dimension of the channel you are forming. In this case it is 1" high. (For the rudder and elevator horns it is 5/8".) The top edge needs the 4 degree bevel for spring back. The depth of the form needs to be longer than the legs of the channel, so that it will fit between the vice jaws.
Step Seven: Make the second bend.
Follow the same procedure as in the first.
Step Eight: Mark and cut.
Looking carefully at the plans and making adjustments for the proper radius around holes, mark on the newly formed channel the location of holes and cut away areas. Don't use a pencil (graphite can cause aluminum to corrode). Use a fine point permanent marker. Place a scrap piece of wood between the legs of the channel and drill the matching holes at one time. A drill press is handy here. This insures that your holes line up! Cut away the areas marked and sand and polish the edges. Done!