Making a Homemade Prop
There's NO way I'm going to be able to go through a step by step guide to prop making, it's too complicated. So I'll just include a few photos of the basic process. If you are truly interested get the book Propellor Making for the Amateur by Eric Clutton, also download How I Carve a Wooden Propellor by Alvin Schubert (be aware it is a 11 meg PDF file.) There is also a very excellent NACA report on propellors by Fred Weick that you should get. It's old, but still full of good information. And be sure to search the internet for other programs, spreadsheets, etc. for help.
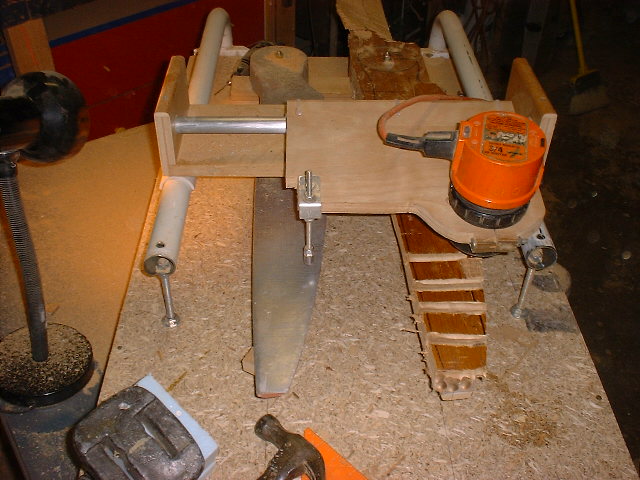
Now this picture represents several steps.
First, on the left in the aluminum color is a prop template that I painstakingly calculated the dimensions, manufactured ribs out of ply, threaded them on a dowel and set the various angles and filled in with styrofoam which was then sanded to contour and finally fiberglassed to give it rigidity and permanence.
Second, I manufactured a 3D prop cutter out of my router and spare parts. You can see that the cutter bar and stylus are tied together on the ply plate which is attached to sleaved pieces of tubing to give up/down and left/right travel. The whole thing is mounted on a sliding truck that glides over large steel tubes. The glides are 1/2 a pvc pipe that fit the tubes nicely.
Third, I laminated 4 1x6 boards (actual 3/4" x 5 1/2 ". Here's where I messed up. I really only needed about 4 sq. inches on the lowest lamination and the width of the boards really needed to be 6 1/4 for the planform I had chosen. So I really wasted alot of wood and had to edge laminate a bit more on the 2nd and 3rd boards.
Fourth, I had to carefully line up the template and blank on the board. I had previously marked the aerodynamic centerline of the prop on both template and blank and then marked parallel lines on the cutter deck to act as repeatable reference lines. You can't see them, but there are adjustable feet below both the template and blank to support them without flexing.
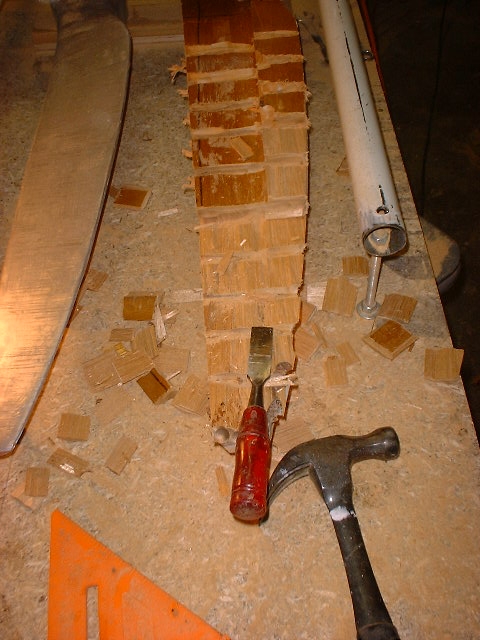
I found that the easiest way cut away the excess wood, was to make a bunch of parallel gouges across the blade (not to full depth!). Then I went back and chunked it out with a chisel. Saved A LOT of sawdust. I wish I had learned it earlier in the process :-}
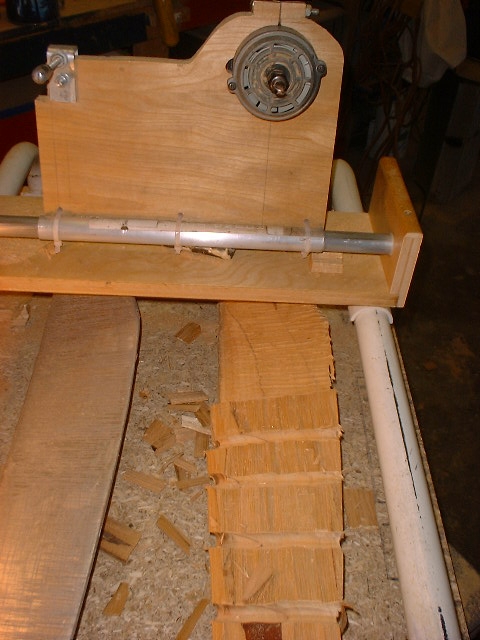
Here you can see the cutting passes being made at the hub end of the prop. I just slowly worked out toward the tip. I tried both ways, but working from center outward seemed to work best.
Now, this is not as precision a machine as it could possibly be. I tried hard to keep the alignment as carefully as possible, but it is best to adjust your cutter so that it actually cuts about 1/16" shallower than your stylus. This means more sanding, but it is safer.
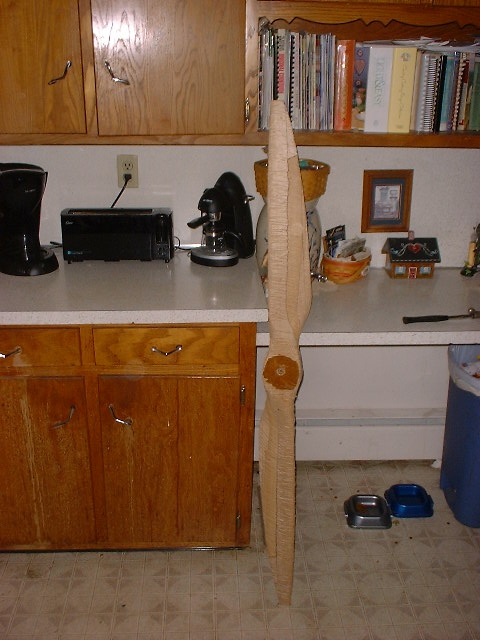
Here it is fresh out of the cutter. A bunch of sanding has to be made, I've discovered that a random/orbital sander starting with 60 grit sandpaper helps cut down the cutter grooves quickly. Then work the blade carefully with progressively finer sandpaper.
BTW I used a 1/2" round carbide tipped router bit for the cutter and made a metal stylus of the same shape.
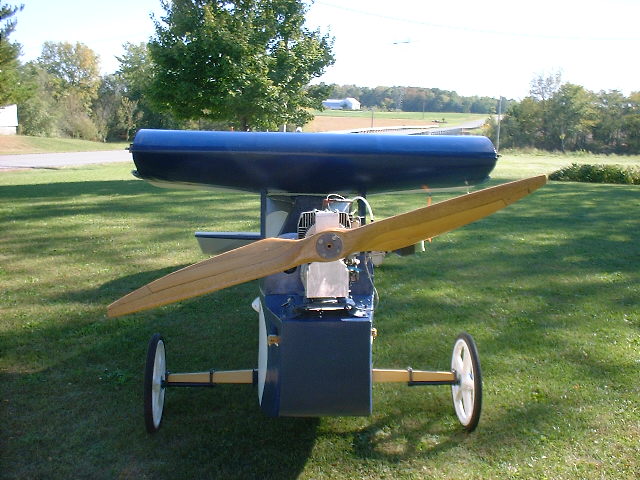


Building the MachNone
A Sky Pup Construction Project