


Building the MachNone
A Sky Pup Construction Project
Making a Prop Blank
You are gonna have to figure out how to design the right prop for your plane on your own:-) I'm not ready to describe that painful . . . er painstaking process. But, once you know what the prop ought to look like, you will need a template to cut the real thing off of. The tried and true method is to use contour gauges and painstakingly cut one from a wooden blank. Here's how I made my blank from styrofoam.
Step One: Prepare the Plywood Ribs
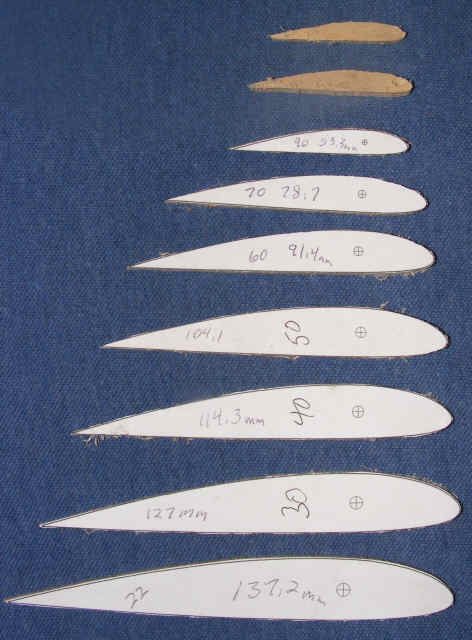
A computer program really helps here. I used Foils 4.2 to print out the appropriate templates on paper at stations 22, 30, 40, 50, 60, 70, 80, 90, 100 percent. Foils 4.2 has a handy feature I use here, I print out the foil shape with the aerodynamic center marked. The paper templates are fixed to scrap pieces of thin ply with spray glue, I used 3 mm ply. Then the ribs are cut out with a bandsaw or scroll saw and sanded to the line. After sanding carefully drill 1/4" holes at the marked aerodynamic centers.
Step 2: Make the Hub/Center Spar Assembly
I start here by cutting out an appropriate number of hub circles with the centers drilled to 3/8". Then the circles are stacked and laminated together. Then drill a hole radially into the hub for the center spar. The spar hole MUST be parallel to the hub faces and exactly 90 degrees to the centering hole. I used JBWeld to bond the 1/4 inch steel rod into the radial hole. The first time I used this method, I used 1/4" wooden dowel. I found that wood here isn't very straight and is too flexible.
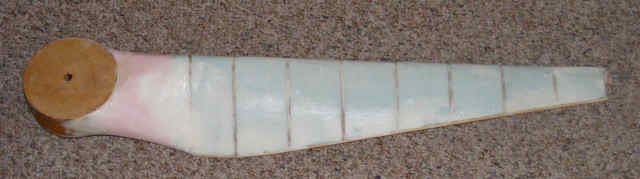
Step 3: Fasten Ribs and Foam Blocks
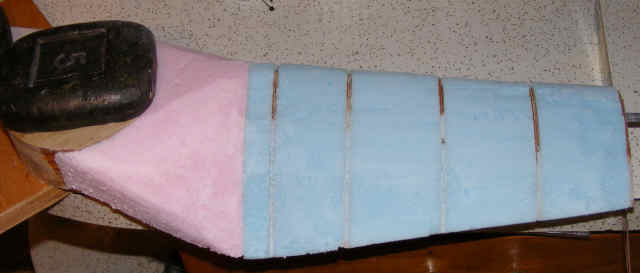
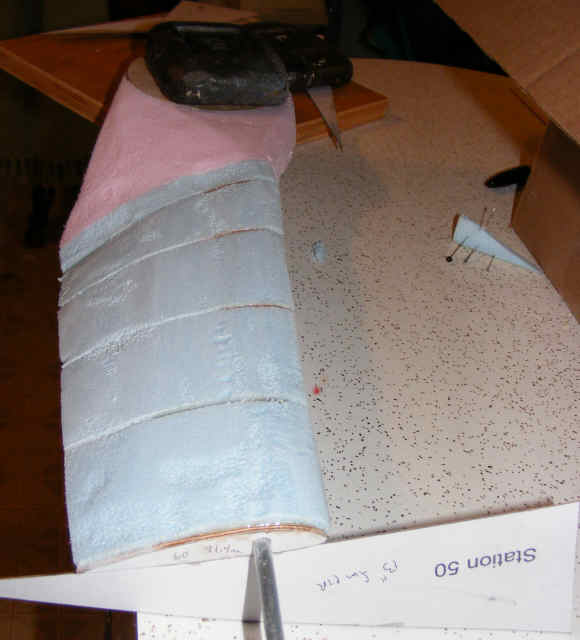
This step is FUN (not really). Since the first station is at 22% of the prop radius, that means that the first two foam blocks have to be custom cut and fit. After that, I fiddled around until I got one foam block with the exact right thickness and then used the tablesaw to zip off enough for the rest of the stations. What I did is smear some epoxy (I used 5 minute gel as it stays put better) and threaded on the foam block and the next rib. Before the glue sets I use an angle/pitch gauge that I had previously preparded to set the ribs appropriate pitch. I pinned everything in place and wait for the glue to set before going on to the next rib.
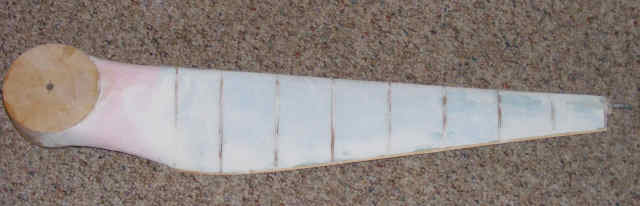
Step 4: Shape the Prop Template
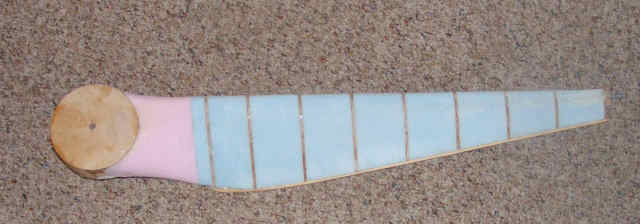
Once everything is together and the epoxy is well set, I start carefully sanding with a long sanding block with new 80 grit sandpaper working carefully down to the ribs. I use a 1 inch dowel with 80 grit to shape the faired-in section near the hub. The trailing edge will be extremely fragile, so I use the sanding block to sort of file a flat at the trailing edge and then I glue a piece of very thin wooden dowel (1/8 inch I think) there to give you something firm to work against. Then get everything shaped up pretty well.
Step 5: Fill and Final Sanding of the Template
There are bound to be some dings, digs and low spots. I used "Fast 'n Final Spackling" to fill the foam imperfections and the roughness. Finish sanding with 100 grit sandpaper.
Step 6: Glass the Template
I added one layer of fibreglass with epoxy to give the surface rigidity. After some sanding, the blank is ready for the copier.